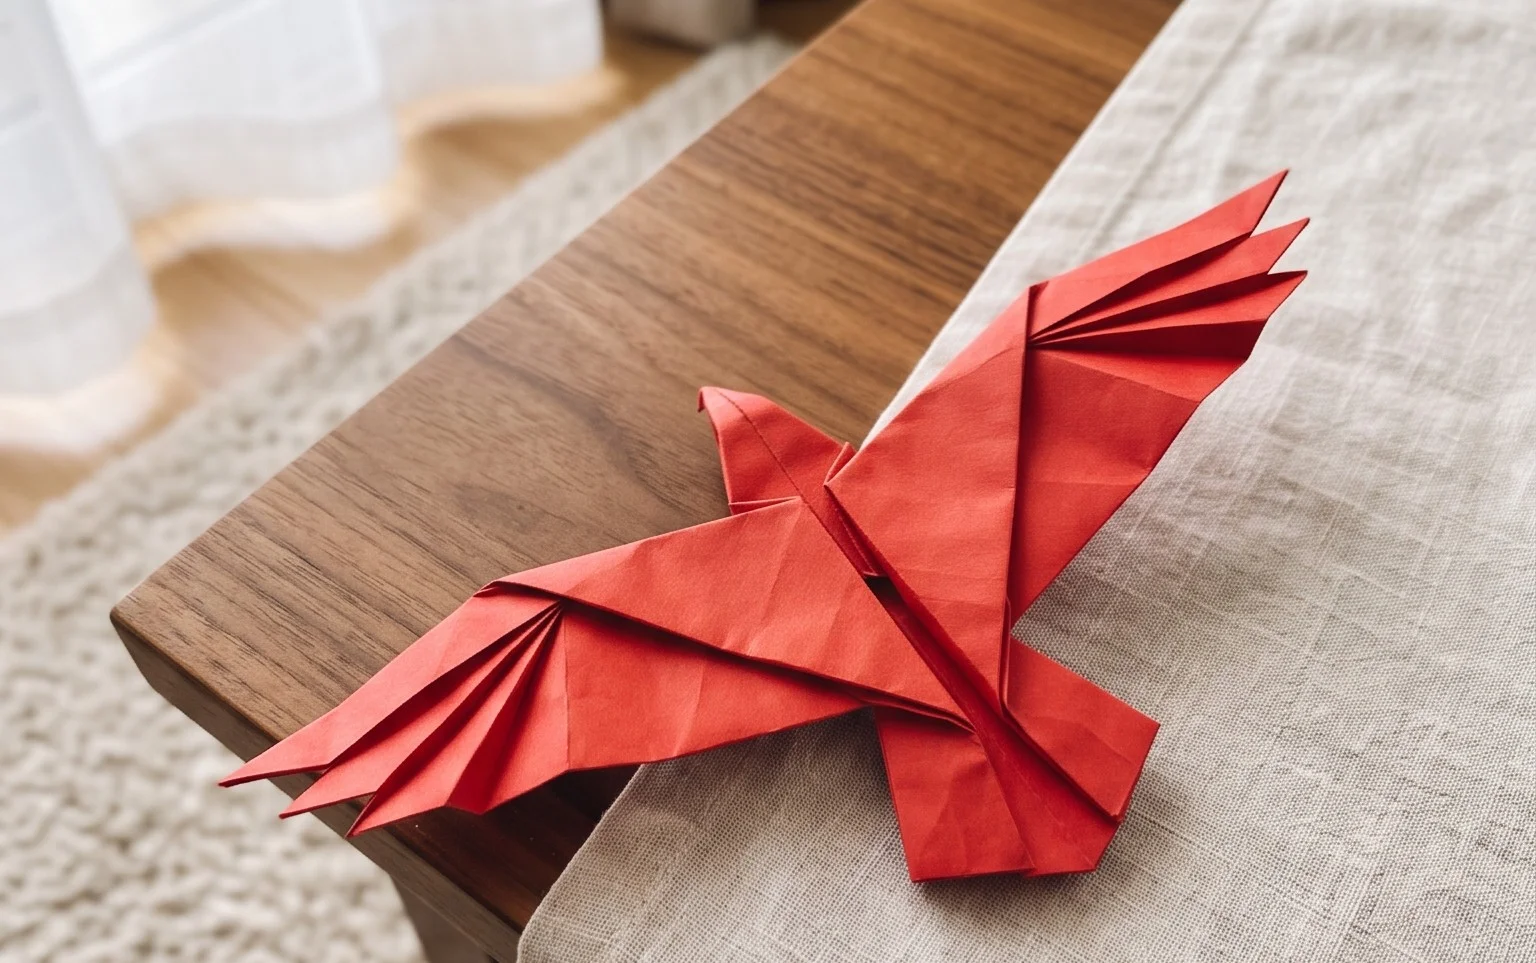
Origami Eagle: Step-by-Step Instructions await you! Are you ready to transform a simple square of paper into a magnificent bird of prey, its wings spread wide as if ready for flight? This majestic origami eagle will become a striking display piece, perfect for adorning a bookshelf or desk.
This project is fantastic for complete beginners and older kids, offering a rewarding experience that typically takes around 20-30 minutes. You’ll learn fundamental origami folds and how to shape them to create a recognizable and impressive creature. Get your paper ready, and let’s get folding!
Origami Eagle: Step-by-Step Instructions
Hello, fellow origami enthusiasts! Today, we’re going to embark on a majestic journey to create an origami eagle. This model, while appearing complex, is surprisingly achievable with patience and a bit of careful folding. The elegance of a bird of prey taking flight is a wonderful thing to capture in paper, and this origami eagle is a fantastic representation. I’ll guide you through each step, assuming you’re relatively new to the world of paper folding. My goal is to make this as clear and straightforward as possible, so don’t hesitate to reread sections or slow down as needed. Let’s spread our wings and begin!
Choosing Your Paper: The Foundation of Flight
Before we start folding, let’s talk about the most important material: your paper. The type of paper you choose can significantly impact the ease of folding and the final look of your eagle. For this project, I highly recommend using standard origami paper. This paper is specifically designed for folding – it’s thin enough to allow for many layers without becoming too bulky, strong enough to hold creases, and usually has a pleasing matte finish.
When it comes to weight, anything between 60gsm and 80gsm is ideal. Thicker paper can be difficult to fold precisely, especially in the later stages with multiple layers, while very thin paper might tear too easily. Standard printer paper (around 80gsm) can work in a pinch, but it tends to be a bit stiffer and might result in a less crisp model.
Size is also important. For your first few eagles, I’d suggest starting with a square sheet of at least 15cm x 15cm (about 6 inches x 6 inches). This size provides enough room to make precise folds and makes it easier to handle the paper. As you become more comfortable, you can experiment with smaller sizes for a more delicate look or larger sizes for a more dramatic statement.
Finally, consider whether you want a single-sided or double-sided paper. For an eagle, single-sided paper is often preferred. This way, when you make folds, the white underside of the paper will be less visible, creating a more uniform and natural-looking bird. If you use double-sided paper with contrasting colours, you can achieve a unique effect, perhaps with the darker colour for the main body and a lighter colour for the underside of the wings. However, for a classic eagle look, I’d lean towards single-sided paper with a colour like brown, grey, or black.
The Base Folds: Building the Framework
Origami relies on fundamental folds that form the basis for more complex models. For our eagle, we’ll be using a few key bases. Learning to make these folds cleanly will set you up for success. Take your time, and focus on precision.
The Preliminary Base (Square Base):
This is a fundamental base for many origami models. It’s essentially a square that has been folded in half both horizontally and vertically, then opened up to create crease lines. This base will allow us to form the bird base later.
- Start with your square paper with the coloured side facing down (white side up, if using single-sided paper).
- Fold the paper in half horizontally, bringing the bottom edge up to meet the top edge. Crease firmly. Then, unfold.
- Now, fold the paper in half vertically, bringing the left edge over to meet the right edge. Crease firmly. Unfold. You should now have two intersecting crease lines forming a ‘+’ in the center of your square.
- Flip the paper over so the coloured side is facing up.
- Fold the paper in half diagonally, bringing the bottom-left corner up to meet the top-right corner. Crease firmly. Unfold.
- Fold the paper in half diagonally again, bringing the bottom-right corner up to meet the top-left corner. Crease firmly. Unfold. You should now have an ‘X’ of diagonal creases on the coloured side and a ‘+’ of creases on the white side.
- Now, we’ll collapse the paper into the preliminary base. Hold the paper with the coloured side up. Gently push the left and right sides inwards along the vertical crease line. As you do this, the top and bottom edges will come together. The diagonal creases will help guide the paper. You should end up with a smaller square, with four flaps pointing downwards, resembling a diamond shape. The closed point will be at the top, and the open flaps at the bottom. This is your preliminary base.
The Bird Base:
This base is crucial for many bird models, including our eagle. It’s derived from the preliminary base and sets up the structure for the head, tail, and wings.
- Start with your preliminary base, with the open flaps pointing towards you. The closed point should be at the top.
- Take the top layer of the right flap. Fold its bottom edge to meet the center vertical crease line. Crease firmly.
- Repeat this on the left flap: take the top layer of the left flap and fold its bottom edge to meet the center vertical crease line. Crease firmly. You should now have a kite shape on the top layer.
- Now, take the top triangular flap formed by these two folds. Fold its tip down so that it aligns with the point where the two folded edges meet at the center. Crease firmly.
- Unfold the last three folds you just made (the two kite folds and the small triangle fold). You should have crease lines on the top layer.
- Now comes a crucial step for forming the bird base. Lift the top layer of paper upwards. As you lift, use the crease lines you just made as guides. The sides of the paper should naturally fold inwards along those creases. Flatten the paper down into a diamond shape. This technique is called a ‘petal fold’ and it’s very common in origami. Ensure the point is sharp at the top and the bottom edges are aligned.
- Flip the paper over.
- Repeat steps 2-5 on this side. Fold the bottom edge of the right flap to the center crease, then the bottom edge of the left flap to the center crease. Fold the small triangle tip down. Then, unfold these three folds.
- Perform another petal fold on this side, just as you did on the other side. Lift the top layer, allow the sides to collapse inwards along the existing creases, and flatten into a diamond shape.
- You have now completed the bird base! It should look like a diamond with two ‘legs’ or flaps at the bottom.
The Fold Sequence: Bringing Your Eagle to Life
Now that we have our preliminary and bird bases mastered, let’s proceed with folding our eagle. I’ll describe each fold clearly, so you can follow along without needing diagrams.
- Start with your bird base, with the two ‘legs’ pointing downwards. The closed point should be at the top.
- Take the right ‘leg’ of the bird base. Fold it upwards, so the tip of the leg points towards the top closed point of the base. The fold line should run from the bottom corner of the base towards the center. This will become one of the wings. Crease firmly.
- Repeat on the left side. Take the left ‘leg’ of the bird base and fold it upwards, aligning its tip with the top closed point. This will be the other wing. Crease firmly. You should now have two pointed flaps extending upwards from the sides.
- Flip the entire model over.
- Repeat steps 2 and 3 on this side. Fold the right leg upwards, and then the left leg upwards. You should now have four pointed flaps extending from the sides of the main body.
- Now, we need to define the head and tail. Look at the two flaps that are currently pointing upwards and outwards (these are the ‘legs’ of the bird base that we folded up in steps 2 and 3). We’re going to create a head and a tail from these. Let’s focus on one of these flaps. We’ll turn one of them into the head and the other into the tail.
- Take the rightmost of these upward-pointing flaps. We’re going to perform an inside reverse fold to create the head. To do this, open up the flap slightly. Identify the point where you want the neck of the eagle to begin. Make a crease there, folding the tip inwards. Then, carefully tuck the tip inside the model, folding the paper back on itself along the creases you just made. This creates a sharp, pointed head. You might need to adjust the angle of the neck by making small creases.
- Now, take the corresponding flap on the opposite side (the leftmost of the upward-pointing flaps). This will become the tail. We’ll do a simple fold here. Fold this flap upwards at an angle that looks pleasing for a tail. You can choose to have it straight up, or slightly fanned out. Crease firmly.
- Let’s refine the wings. Look at the two larger flaps that are now extending from the sides. These are the main wings. We’ll add a bit of shape to them.
- Take the top layer of the right wing. Fold it downwards at an angle, about halfway down the length of the wing, to create a crease. This will give the wing a more defined shape. Don’t fold it all the way to the edge of the paper; aim for a diagonal fold from near the body outwards. Crease firmly.
- Repeat on the left wing. Take the top layer of the left wing and fold it downwards at a similar angle. Crease firmly.
- Now, let’s give our eagle some feet. Look at the two points at the very bottom of the model, where the original ‘legs’ of the bird base were. We’re going to create simple folded feet. Take the right bottom point. Fold a small section of it upwards, then fold that small section down again, creating a small zig-zag fold that resembles a foot. Crease firmly.
- Repeat on the left bottom point, making a similar zig-zag fold for the other foot.
- Finally, you can adjust the pose of your eagle. Gently bend the wings slightly upwards or downwards to give them a more dynamic look. You can also slightly curve the neck and tail. Take a moment to admire your finished origami eagle!
Common Pitfalls and How to Avoid Them
Even with clear instructions, beginners can sometimes stumble. Here are a couple of common areas where people tend to go wrong, and how you can avoid them:
- Messy Creases: This is probably the most frequent issue. If your creases aren’t sharp and precise, the subsequent folds will be difficult to align.
- How to avoid: Use your fingernail or a bone folder (if you have one) to press down firmly along every fold. When folding, align edges and corners perfectly before making the crease. It’s better to make a slightly imperfect fold and then adjust it than to make a sloppy one. Precision from the start makes a huge difference.
- Incorrect Petal Fold: The petal fold is a key technique for the bird base, and if done incorrectly, the entire base will be skewed.
- How to avoid: Pay close attention to step 5 and step 8 of the bird base instructions. When you lift the top layer, let the existing creases guide the paper inwards. Don’t force it. If it feels like you’re struggling, it might mean the previous folds weren’t sharp enough, or you’re trying to fold a different section. Ensure you’re only lifting the top layer and allowing the sides to collapse inwards along those pre-creased lines. Watching a video of the petal fold might be helpful if you’re still struggling with this specific step.
Varying Your Eagle: A Splash of Creativity
Once you’ve mastered the basic eagle, don’t be afraid to experiment! Origami is all about personal expression.
- Size: As mentioned earlier, using larger or smaller squares of paper will naturally result in larger or smaller eagles. For larger eagles, consider using paper that is a bit sturdier to hold its shape. For miniature eagles, very thin, crisp paper is best.
- Paper Pattern: This is where you can really have fun! Instead of plain coloured paper, try patterned origami paper. You could use paper with a wood grain effect for a natural look, or even paper with a subtle sky pattern for a dramatic backdrop. If you use double-sided paper with different patterns or colours on each side, you can create a unique two-toned effect on the wings or body.
- Colour: Don’t feel limited to brown or grey. What about a white eagle, like a bald eagle? Or perhaps a striking black eagle? Experiment with different colour combinations. You could even try iridescent paper for a truly dazzling effect.
Displaying and Gifting Your Origami Eagle
Your finished origami eagle is a beautiful piece of art! Here are a few ideas for showcasing your creation:
- Desk Decoration: Place your eagle on your desk as a constant reminder of your accomplishment. Its majestic presence can be quite inspiring.
- Mobile or Garland: If you make several eagles, you can string them together to create a beautiful mobile for a child’s room or a unique garland for a party.
- Gift with a Message: Origami is a thoughtful gift. Tuck a small, handwritten note inside the eagle’s wings or attach it to the base. It’s a unique and personal way to show someone you care.
- Part of a Larger Scene: Combine your eagle with other origami models, like trees or mountains, to create a miniature diorama.
- Centerpiece: For a nature-themed event or even just as a striking addition to your home decor, an origami eagle can make a fantastic centerpiece.
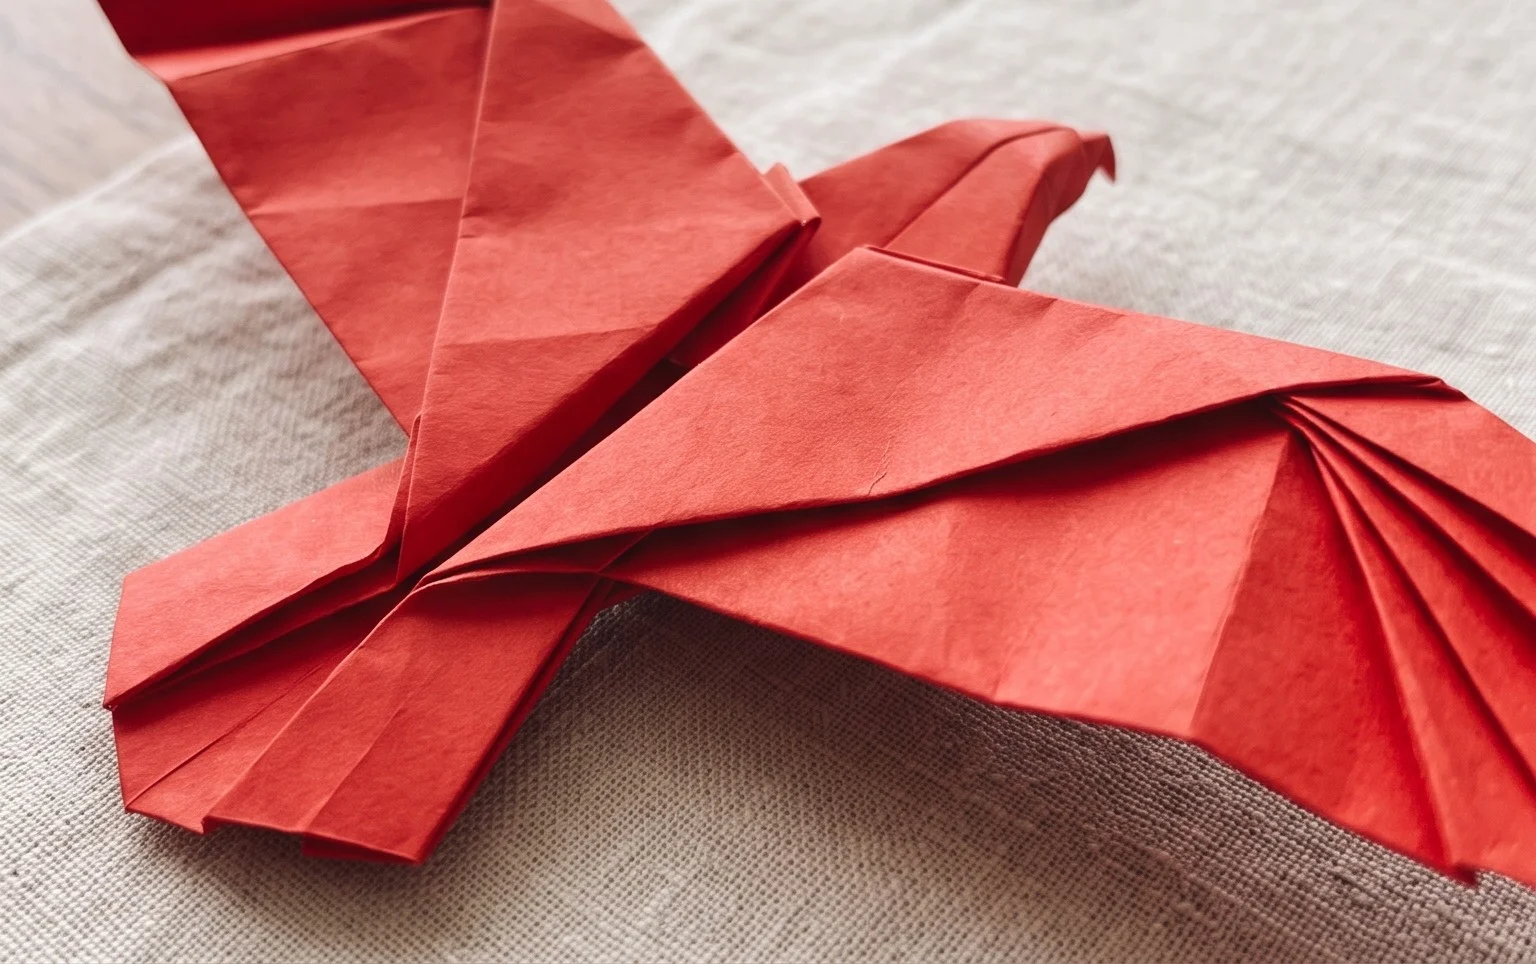
I hope you’ve enjoyed this journey into creating your origami eagle. Remember, practice makes perfect. The more you fold, the more confident and precise you’ll become. Happy folding!
Conclusion
Congratulations on folding your very own origami eagle! We hope you enjoyed this step-by-step guide. Don’t worry if your first attempt isn’t perfect; every fold is practice, and with a little patience, your paper eagle will soar. We’d love to see your majestic creation, so feel free to share your finished origami eagle with friends or family!
For your next adventure, why not try folding a delicate origami crane or a fierce origami dragon? The possibilities with paper are endless! We invite you to explore even more exciting paper projects and discover the joy of creating.