Let’s get started with our Accordion Paper Snake Craft – Easy Peasy and Fun! Imagine a vibrant, segmented snake slithering its way across your desk or shelf, its body rippling with every fold. This delightful craft is perfect for complete beginners, young children, or anyone looking for a quick, enjoyable project that takes less than 15 minutes. It’s also a fantastic idea for making cute, personalized gifts or charming decorations. Throughout this tutorial, you’ll learn the simple yet satisfying technique of accordion folding to create a long, flexible snake body. We’ll also cover how to add a simple head and tail to bring your paper serpent to life. Get your paper ready – we’re about to have some folding fun!
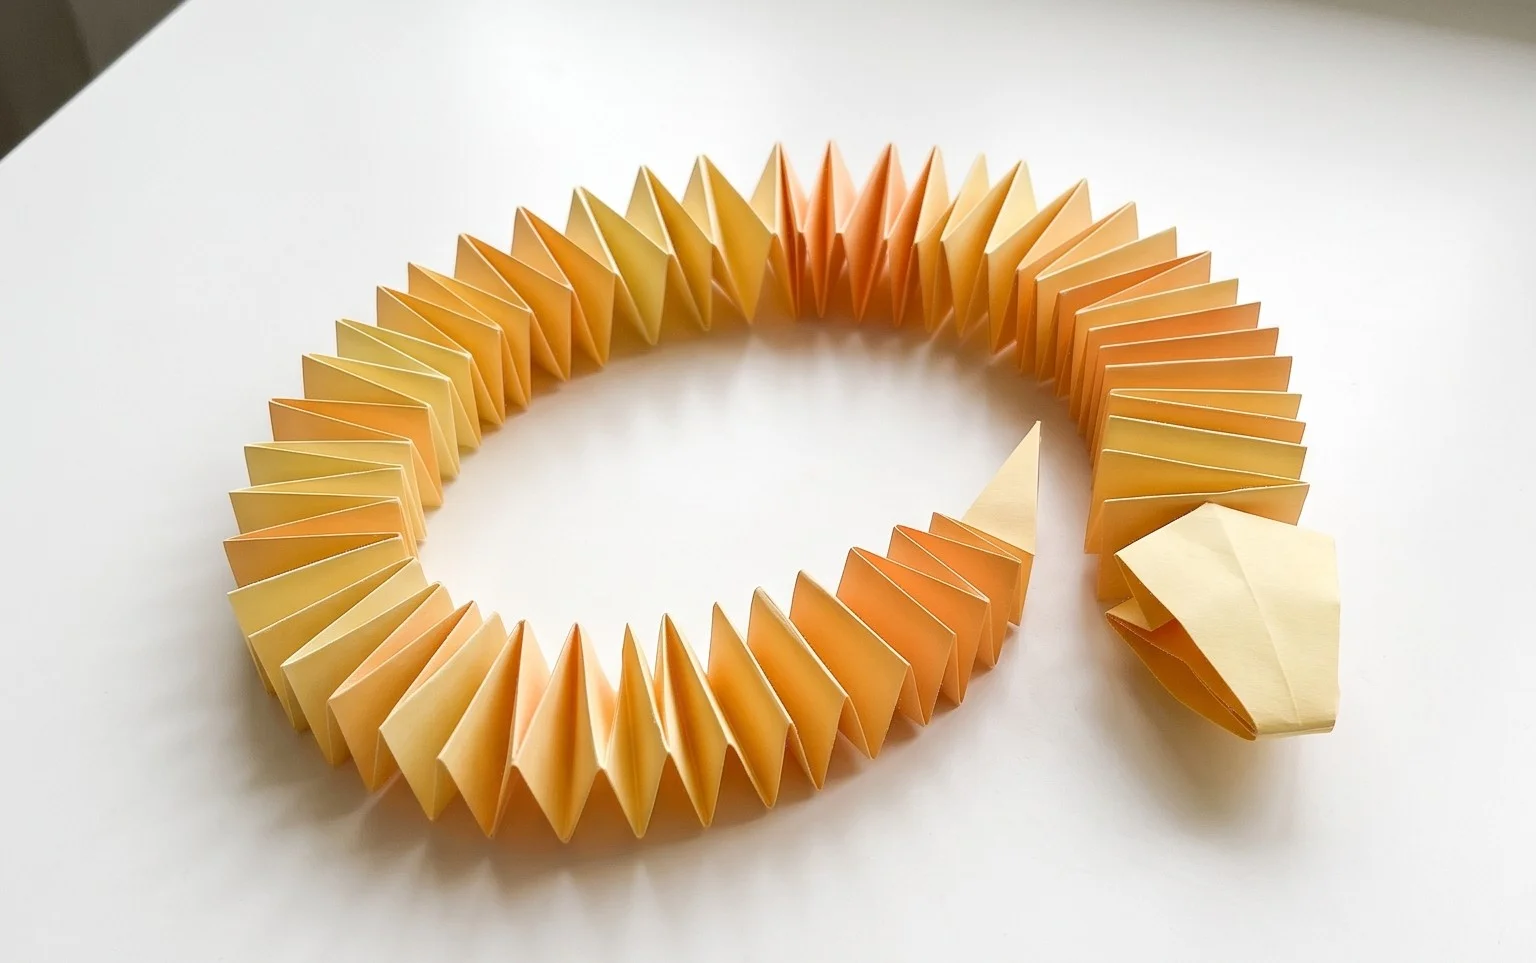
Accordion Paper Snake Craft – Easy Peasy and Fun
Hello origami enthusiasts and craft lovers! Today, we’re diving into a wonderfully simple yet incredibly satisfying origami project: the Accordion Paper Snake. This craft is perfect for all ages, from little ones taking their first steps into the world of paper folding to adults looking for a relaxing and quick creative outlet. We’ll guide you through each step with clear, plain language, ensuring you can create a charming paper snake without needing a single diagram. Get ready for some easy peasy, fun paper folding!
Choosing Your Paper: The Foundation of a Fantastic Snake
The right paper can make a world of difference in your origami experience. For our Accordion Paper Snake, you have a lot of flexibility, but let’s talk about what works best.
- Type of Paper: Standard printer paper (copier paper) is perfectly fine for this project. It’s readily available, inexpensive, and holds creases well. If you want something a bit more robust, cardstock can also work, but it will make the folding a little stiffer, especially for younger hands.
- Weight: For beginners, I’d recommend paper in the 70-80 gsm range, which is typical for printer paper. This weight is light enough to fold easily but sturdy enough to hold its shape.
- Size: You can use any size paper, but a standard A4 or letter-sized sheet (roughly 8.5 x 11 inches or 21 x 29.7 cm) is a great starting point. If you want a smaller snake, you can cut your paper down. If you want a longer snake, you can tape two pieces of paper together or start with a longer rectangle.
- Single or Double-Sided: This is where you can get creative! A single-sided coloured paper will give you a snake with one coloured side and one white side, which can create a lovely striped effect as you fold. Double-sided coloured paper will result in a snake where both sides are coloured, offering a bolder look. Patterned paper is also a fantastic choice and can give your snake a unique personality!
The Base Folds: Building the Body of Your Snake
Our Accordion Paper Snake relies on a very fundamental origami fold: the accordion fold, also known as a pleat. Mastering this simple fold is key to creating a lively, flexible snake.
The accordion fold is essentially creating a series of parallel folds that go back and forth, like the bellows of an accordion. To make these folds cleanly, here’s my best advice:
- Precision is Key: Line up your edges and corners as accurately as possible. Even a tiny misalignment can create a ripple effect that makes later folds more difficult.
- Sharp Creases: Once you’ve aligned your edges, run your fingernail firmly along the fold line. This will create a sharp, crisp crease that holds its shape better. Go over it a couple of times for extra definition.
- Work on a Flat Surface: Always fold on a hard, flat surface. This will ensure your folds are even and you can apply the necessary pressure for clean creases.
Let’s Get Folding! Your Numbered Walkthrough
Alright, let’s get our paper and start folding! We’re going to create our beautiful Accordion Paper Snake.
Step 1: Prepare Your Paper
Place your rectangular sheet of paper in front of you horizontally (landscape orientation). If you are using single-sided paper and want the colour to be the main body of your snake, ensure the coloured side is facing down.
Step 2: The First Accordion Fold
Take the bottom edge of the paper and fold it up to meet the top edge. Crease firmly along the fold. You should now have a long, thin rectangle, half the original height.
Step 3: The Second Accordion Fold
Now, take the new bottom edge (which is the folded edge from Step 2) and fold it up to meet the top edge again. Crease very firmly. You will now have an even longer, thinner rectangle, one-quarter of the original height.
Step 4: Continue Folding (The Accordion Action!)
You’re going to repeat this process – folding the bottom edge up to meet the top edge and creasing firmly – until you have a long, narrow strip of paper that is as thin as you can comfortably fold it. Aim for about 1-2 cm (or roughly half an inch) in width. The more folds you make, the more segmented and snake-like your final creation will be!
Step 5: Creating the Snake’s Head (The Accordion Twist)
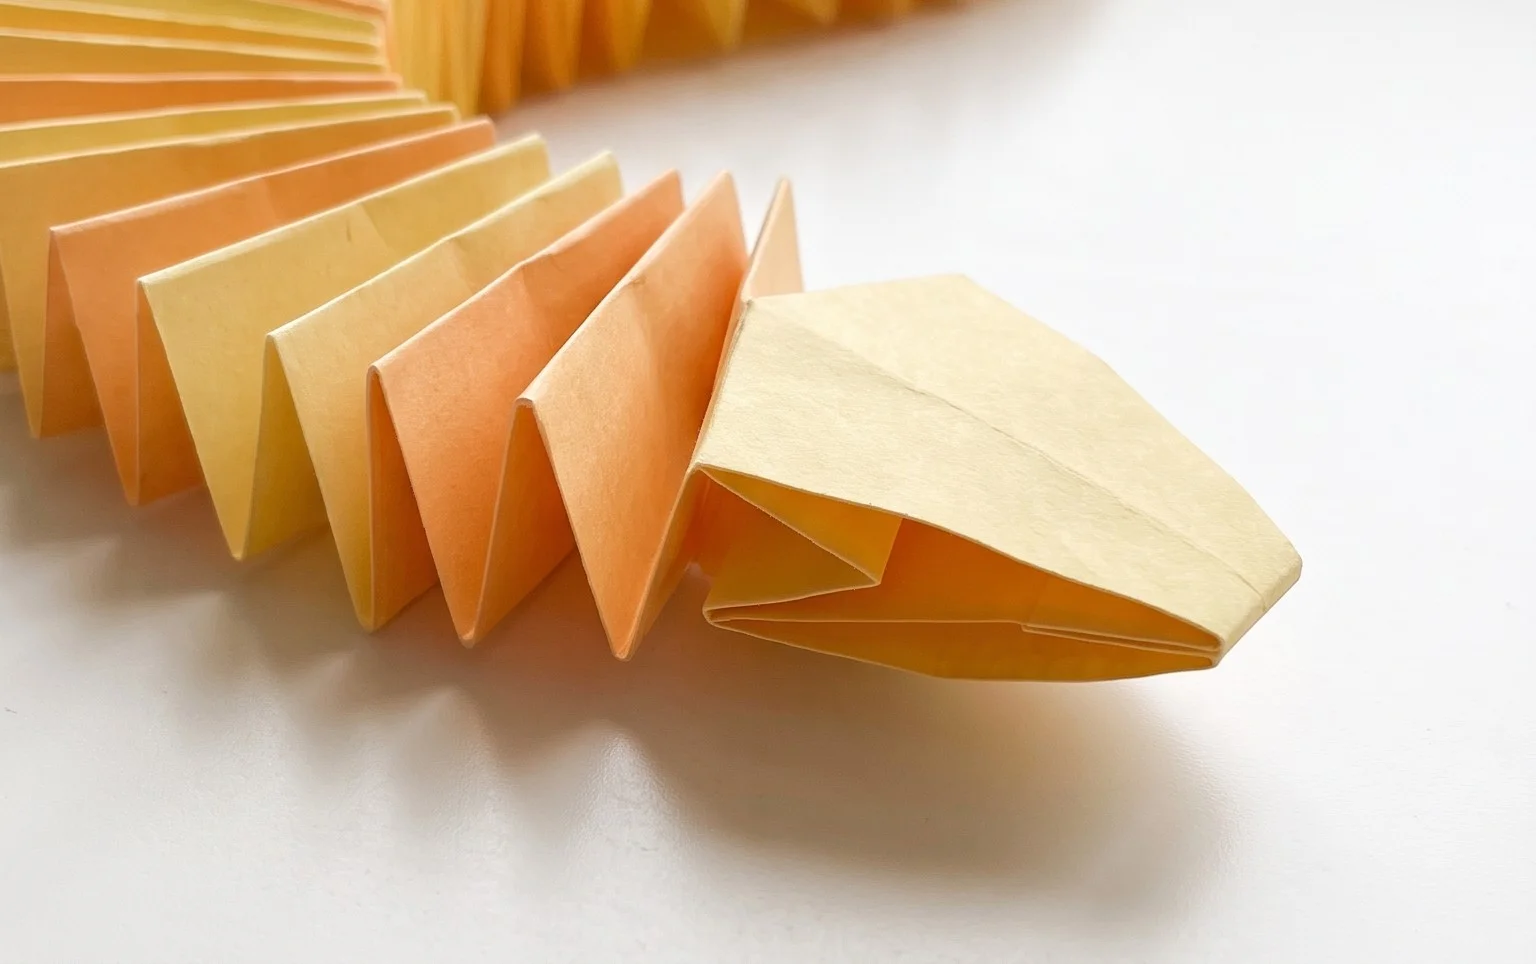
Once you have your long, pleated strip, find one end. This will become the snake’s head. Gently open up the pleats at this end just a tiny bit, about 2-3 cm (1 inch). Now, take this opened section and fold it downwards, so the end of the strip is now pointing towards you, perpendicular to the main body of the snake. Crease this fold to create the neck. You’ve just made a simple bend to start forming the head!
Step 6: Shaping the Head
With the head section folded downwards, you can now gently open up the pleats within this folded-down section. You want to create a slightly fanned-out look. You can achieve this by carefully pulling apart the layers of paper at the very tip of this folded-down section. You’re not unfolding the accordion pleats themselves, but rather separating the layers within that small head section to give it a bit of volume and shape. Think of it like gently fanning out the end of a ribbon. This will give your snake a distinct head.
Step 7: Final Touches – The Tail
Leave the other end of your long pleated strip as is. This will be the tail. The beauty of the accordion fold is that it’s already segmented and ready to wiggle!
Step 8: Bringing Your Snake to Life!
Hold your snake by the body and gently pull the ends apart. Watch as the accordion folds expand and contract, giving your snake a lovely, slithery movement. You can even gently bend and curve the body to pose your snake.
Common Pitfalls and How to Avoid Them
Even with simple folds, it’s easy to run into a few snags. Here are the two or three places beginners usually go wrong and how to steer clear of them:
- Uneven Folds: This is the most common issue. If your accordion folds are not consistently the same width, your snake will look lopsided.
- How to Avoid: Focus on making your very first fold as accurate as possible. Then, when you make subsequent folds, use the edge of the previous fold as your guide for the new fold. Precision in Step 2 is paramount for making all other folds consistent.
- Weak Creases: If your creases aren’t sharp, your snake won’t hold its shape well and might look a bit floppy.
- How to Avoid: As mentioned earlier, use your fingernail or a bone folder (if you have one) to make your creases as sharp and defined as possible. Press down firmly along the entire length of each fold.
- Over-Opening the Head Section: When creating the head in Step 6, it’s tempting to pull the pleats too far apart, which can make the head look messy or unravel the carefully constructed body.
- How to Avoid: Be gentle! You’re not unfolding the accordion; you’re just slightly separating the layers at the very tip of the folded-down section to give it some visual definition. A little goes a long way here. Just a slight fanning out is enough.
Varying Your Snake: Endless Creative Possibilities
The beauty of this craft is its adaptability! Here’s how you can make your snake unique:
- Size Matters:
- Smaller Snakes: Cut your starting paper into smaller rectangles. For a miniature snake, you might use a strip of paper that’s only 1-2 inches wide to begin with and then fold it down.
- Larger Snakes: Use larger paper or even tape two sheets of paper together end-to-end to create a longer, more impressive snake.
- Paper Patterns and Colours:
- Patterned Paper: Experiment with origami paper that has beautiful patterns, like traditional Japanese Washi paper, geometric designs, or even fun novelty prints. This can give your snake a vibrant and distinct look.
- Colour Combinations: Use paper with contrasting colours on each side for a dynamic effect. Or stick to a single, bold colour for a classic look.
- Metallic or Glitter Paper: For a special occasion snake, try using metallic or glitter paper for extra sparkle!
Displaying and Gifting Your Wriggly Wonders
Once your snake is complete, the fun isn’t over! Here are some ideas for showcasing your creations:
- Desk Buddy: Place your snake on your desk as a cheerful companion while you work or study. Its bendable nature means you can pose it in fun ways!
- Party Decorations: String multiple snakes together to create a decorative garland for parties or a child’s bedroom.
- Science Project Helper: Use them to demonstrate concepts like elasticity or simple machines (how the accordion fold works).
- Classroom Craft: This is an ideal project for school or craft groups, as it’s inexpensive and easy for everyone to participate.
- Gifts: These little snakes make wonderful, handmade gifts for friends, family, or even as small party favours. Package them in a small box or tie a ribbon around their middle.
There you have it! Your very own Accordion Paper Snake, made with a few simple folds. I hope you had as much fun making it as I do every time I fold one. Happy folding, and may your snakes be ever so slithery and spectacular!
Conclusion
You’ve done it! You’ve brought your very own accordion paper snake to life. Don’t worry if your first attempt isn’t perfect; every fold is practice, and the journey of creating is just as enjoyable as the final result. We hope you had a fantastic time making this easy peasy and fun craft. Show off your fantastic accordion paper snake to friends and family! For your next adventure, why not try making your snake longer by adding more paper sections, or even experiment with different colored papers for a vibrant, multi-hued creature? There are so many exciting paper projects waiting for you to explore. Happy folding!