Easy Origami Dinosaur: Step-by-Step Paper Craft
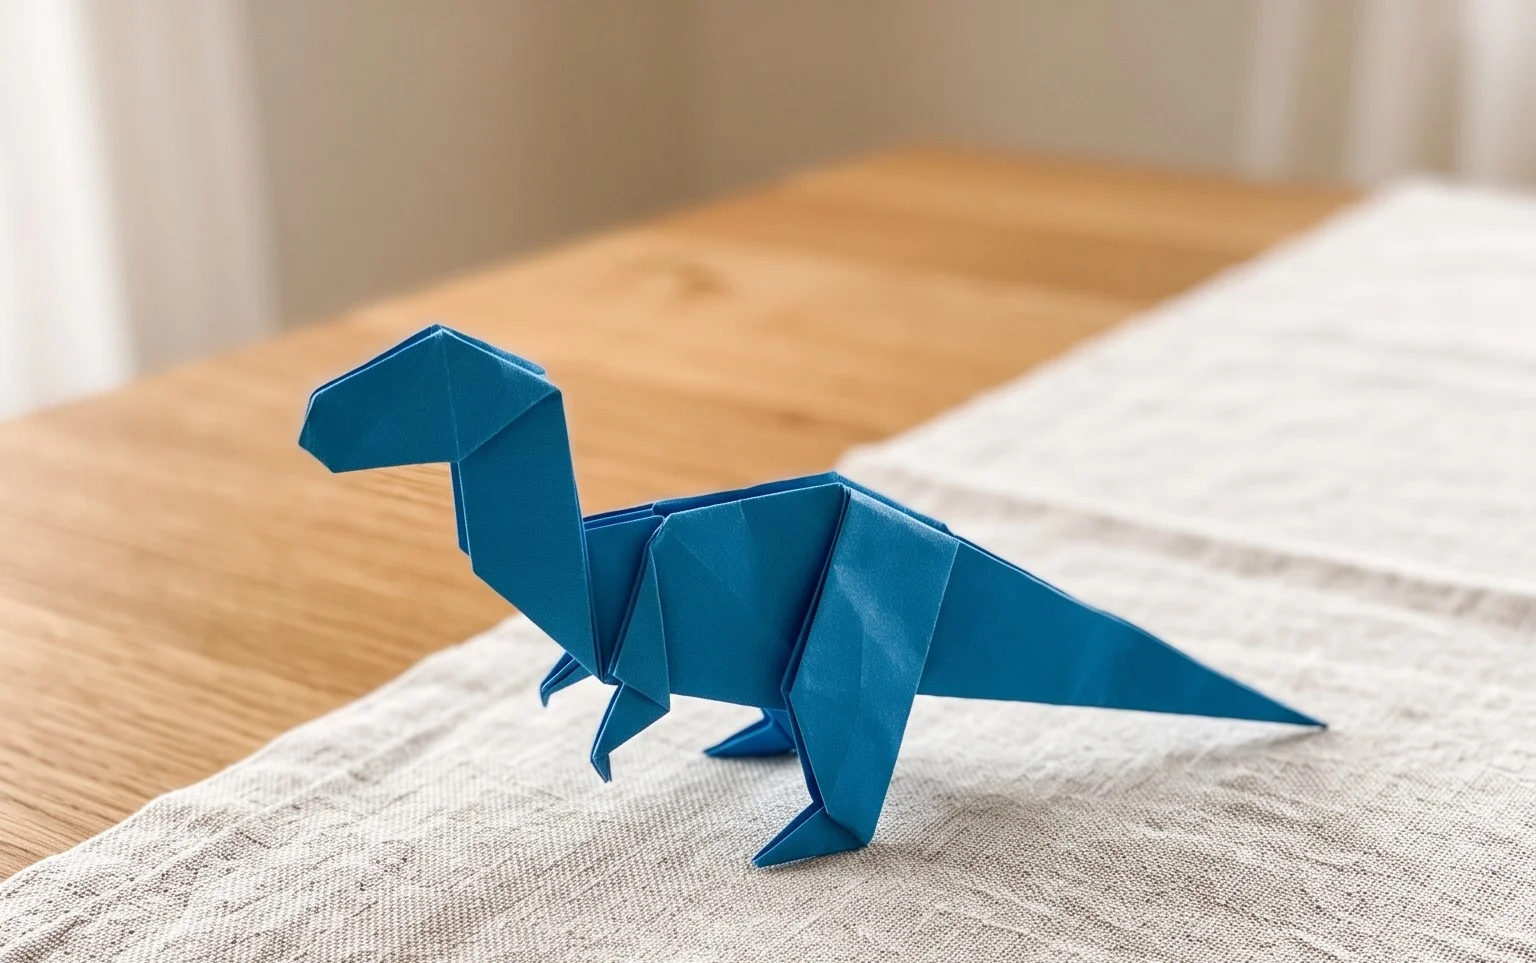
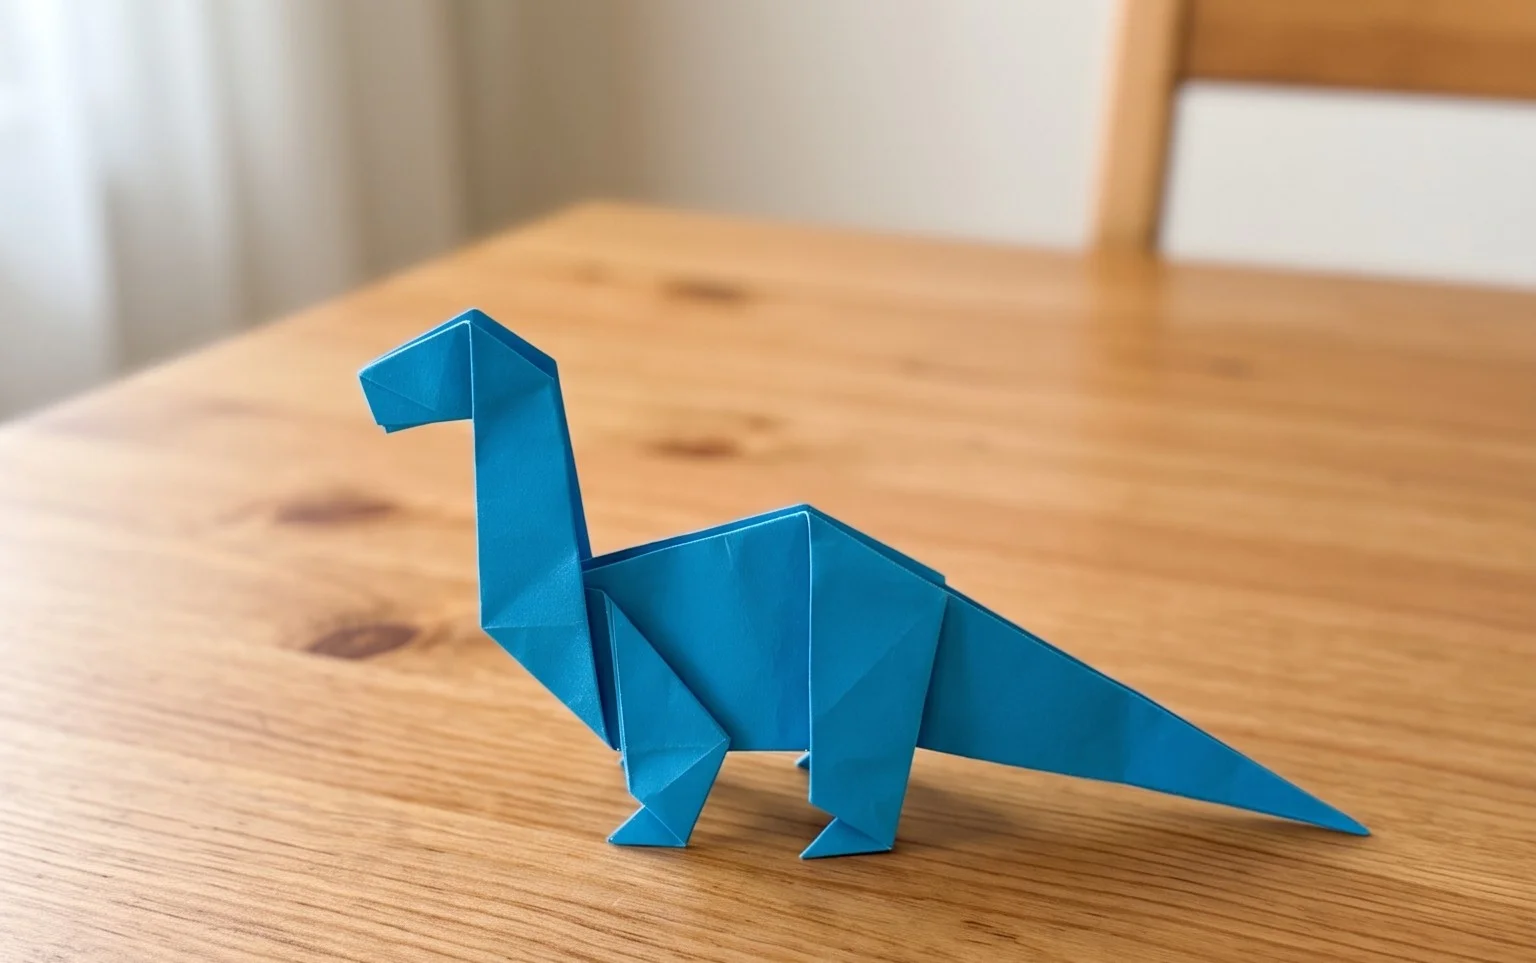
Origami Dinosaur: Step-by-Step Instructions await! Get ready to bring a prehistoric friend to life, right at your fingertips. Imagine a proud, standing dinosaur, complete with a sturdy body, a long, elegant neck, and a distinctive head – all folded from a single sheet of paper! This is a fantastic project for complete beginners and kids alike, taking roughly 15-20 minutes to complete. It makes for a wonderfully unique decoration or a thoughtful handmade gift.
In this tutorial, you’ll learn the foundational folds of origami, guiding you through each crease with clarity. We’ll tackle simple mountain and valley folds, understand how to create crisp edges, and discover the magic of transforming a flat square into a three-dimensional creature. So grab your paper, and let’s embark on this exciting folding adventure together!
Origami Dinosaur: Step-by-Step Instructions
Welcome to my origami dinosaur tutorial! I’m so excited to guide you through creating your very own prehistoric friend. Origami can seem a little daunting at first, but with clear instructions and a little patience, you’ll be amazed at what you can fold. This particular dinosaur model is a fantastic choice for beginners because it’s relatively straightforward but still produces a wonderfully recognizable shape. Let’s get started on bringing this ancient creature to life with just a piece of paper!
Choosing Your Paper
The paper you use is one of the most important factors in achieving a great origami result. For this dinosaur, I recommend starting with standard origami paper.
What type of paper? Standard origami paper is ideal. It’s specifically designed to hold creases well and is thin enough to allow for multiple folds without becoming too bulky. If you don’t have dedicated origami paper, you can try printer paper, but be aware it’s a bit thicker and might make some of the later folds a little more challenging.
What weight? The weight of the paper is also important. Standard origami paper is usually around 70-80 gsm (grams per square meter). This is a good balance – not too flimsy and not too stiff. Printer paper is typically heavier, around 80-100 gsm, which can be fine for simpler models but might be a bit too much for this one, especially in the final stages.
What size? For this tutorial, I’ll assume you’re using a standard origami square size, which is typically 6 inches by 6 inches (15 cm by 15 cm). This is a great size for learning. If you’re feeling adventurous or want to make a statement, you can certainly use larger paper. Just remember that as the paper size increases, so will the dimensions of your finished dinosaur.
Single or double sided? You can use either single-sided or double-sided origami paper. Single-sided paper has a coloured side and a white side. This can be fun to create a dinosaur with a coloured body and white insides showing in certain areas. Double-sided paper is coloured on both sides, giving you a fully coloured dinosaur. I often prefer double-sided paper for a more uniform look, but either will work beautifully.
The Base Folds: Building the Foundation
Before we dive into the dinosaur itself, we need to make a couple of fundamental folds. These are the building blocks of many origami models, and mastering them will make all your future folding much easier.
The Preliminary Base (Waterbomb Base)
This is a very common base in origami, and it’s perfect for creating hollow shapes like our dinosaur.
- Start with your square of paper. If you’re using single-sided paper, place it coloured side down.
- Fold the paper in half horizontally, bringing the bottom edge up to meet the top edge. Crease firmly and then unfold. You should now have a horizontal crease across the middle.
- Fold the paper in half vertically, bringing the left edge over to meet the right edge. Crease firmly and then unfold. You should now have a vertical crease across the middle, intersecting the horizontal one.
- Now, turn the paper over so the coloured side is facing up (if using single-sided paper).
- Fold the paper in half diagonally, bringing the bottom-left corner up to meet the top-right corner. Crease firmly and unfold. You should have a diagonal crease.
- Fold the paper in half diagonally again, bringing the bottom-right corner up to meet the top-left corner. Crease firmly and unfold. You should now have two diagonal creases, forming an ‘X’ across the paper.
- With the coloured side still up, gently push the left and right edges of the paper inwards towards the centre. The creases you’ve made will guide you. As you push the sides in, the top and bottom points will naturally come together. Flatten the paper down so you have a smaller square with four flaps. This is your Preliminary Base, also known as the Waterbomb Base.
The Kite Base (sometimes needed as an intermediate step)
While we might not explicitly call for a Kite Base on its own in this model, understanding it helps with clean folds. A Kite Base is essentially a square where two adjacent edges are folded to meet a central crease.
- Start with a square piece of paper.
- Fold one corner to the centre of the paper. Crease. Unfold.
- Fold an adjacent corner to the centre of the paper. Crease. Unfold.
- You now have two creases meeting at the centre. Fold one of the edges (that isn’t the edge you just folded in) to meet the central crease. Crease firmly.
- Repeat with the adjacent edge, folding it to meet the central crease. Crease firmly. You should have a shape resembling a kite.
The key to making these folds cleanly is to use your fingernail or a bone folder to press down firmly along each crease. This makes subsequent folds easier and gives your final model a sharper, more defined look.
The Fold Sequence: Bringing Your Dinosaur to Life
Let’s get folding! Remember to be patient with yourself. If a fold isn’t perfect the first time, gently unfold and try again.
- Start with your Preliminary Base (Waterbomb Base) with the open end pointing away from you. You should have four flaps.
- Take the top-most flap on the right side and fold its bottom edge to meet the centre vertical crease. Crease firmly.
- Repeat with the top-most flap on the left side, folding its bottom edge to meet the centre vertical crease. Crease firmly. You should now have a kite shape on the top layer.
- Flip the entire model over.
- Repeat steps 2 and 3 on this side: fold the bottom edge of the right flap to the centre crease, and then the bottom edge of the left flap to the centre crease. You should now have identical kite shapes on both sides.
- Now, we need to create the neck and tail. Take the right-hand flap (the one you just folded to the centre) and fold it upwards along the horizontal crease that separates it from the rest of the paper. This will make a long, thin point sticking up. Crease firmly.
- Repeat step 6 with the left-hand flap. This will create another long, thin point sticking up. Crease firmly.
- Flip the model over.
- Repeat steps 6 and 7 on this side. You should now have two long points sticking up on each side of the model.
- This is where the dinosaur shape starts to emerge. Take the entire model and fold it in half vertically, bringing the right side over to meet the left side. Crease firmly along the centre line. You should now have a long, thin shape with two points at the top and two points at the bottom.
- Now, let’s form the neck and tail. Take one of the top points (this will be the neck) and fold it downwards at an angle, away from the centre. The angle will determine how upright or how forward-leaning the neck is. Crease firmly.
- Take the other top point (this will be the tail) and fold it downwards at a similar or slightly different angle, away from the centre. You can make the tail point upwards, downwards, or straight out. Crease firmly.
- To give the neck and tail some shape and definition, we’ll use an “inside reverse fold.” For the neck, gently open up the fold you just made. Then, push the point inwards along the crease line you created, essentially folding it *inside* the model. Flatten it down. This will give the neck a cleaner, more integrated look.
- Repeat step 13 for the tail.
- Now for the head! On the neck, take the very tip and make another inside reverse fold, but this time a smaller one, pushing it inwards to create a beak-like shape for the head. Adjust the size of this fold to your liking.
- Finally, let’s make the legs. Take the bottom two points of the model. Fold one of them upwards at an angle to create a front leg. Then, take the other bottom point and fold it upwards at a similar angle to create a back leg. You can adjust the angle to make your dinosaur stand better.
- To refine the legs, you can also use inside reverse folds here, similar to how we did the neck and tail, to give them a more defined shape and help the dinosaur stand.
- Gently open up the body a little so your dinosaur can stand on its own. You’ve done it! You’ve folded an origami dinosaur!
Common Beginner Pitfalls and How to Avoid Them
Don’t worry if your first attempt isn’t perfect. Origami is a skill that develops with practice. Here are a couple of common areas where beginners often get stuck and how to overcome them:
1. Fuzzy or imprecise creases: This is perhaps the most common issue. When you’re folding, especially the initial base folds, don’t be shy about pressing down firmly. Use your fingernail or a dedicated origami tool (like a bone folder) to flatten every crease. Loose creases make it difficult to align subsequent folds accurately, leading to a messy-looking model. Always ensure your edges and corners meet precisely before creasing.
2. Forgetting to flip the paper: In this model, we flip the paper over at one point to repeat folds. It’s easy to forget this step and end up with an asymmetrical dinosaur. Always double-check your instructions and visualize what the paper should look like before moving on to the next step. If your model looks different from what you expect, a forgotten flip might be the culprit!
3. Over-folding or tearing the paper: This is especially true with thicker paper or when trying to make those inside reverse folds. Be gentle. If a fold feels like it’s tearing the paper, you might be forcing it. For inside reverse folds, it helps to slightly open up the paper along the crease you want to tuck inside, guide the fold, and then re-flatten. Don’t be afraid to unfold and try again if you feel you’re about to damage the paper.
Varying Your Dinosaur
Once you’ve mastered the basic fold, the fun really begins with customization!
Size: As mentioned, you can use larger or smaller squares of paper to create dinosaurs of different sizes. Just remember that larger paper will result in a larger dinosaur, and you might need to adjust the pressure of your folds slightly.
Paper Pattern: Experiment with patterned origami paper! You can find paper with all sorts of designs – geometric patterns, subtle textures, or even realistic textures that can make your dinosaur look even more unique. If you use patterned paper, consider which side you want to be the dominant colour of your dinosaur.
Colour: The colour of your paper will, of course, dictate the colour of your dinosaur. Think about different types of dinosaurs and what colours they might have been. Or, just go wild with bright, unexpected colours for a playful look!
Displaying and Gifting Your Origami Dinosaur
Your completed origami dinosaur is a work of art, and it deserves to be showcased!
Display: You can place your dinosaur on a shelf, a desk, or a windowsill. Because of the way the legs are folded, many origami dinosaurs can stand up on their own. If yours is a little wobbly, you can sometimes tuck a tiny piece of sticky tack or a small piece of paper under one of its feet to help it balance.
Shadow Box: For a more sophisticated display, consider placing your dinosaur in a shadow box. This protects it from dust and creates a beautiful, framed piece of art.
Gifting: An origami dinosaur makes a wonderful, handmade gift for anyone who loves dinosaurs, origami, or just unique little treasures. It’s perfect for birthdays, holidays, or as a thoughtful “just because” present.
Diorama: You could create a mini-diorama for your dinosaur, perhaps with some folded paper trees or rocks, to create a prehistoric scene.
Mobile: If you make several smaller dinosaurs, you could string them together to create a fun dinosaur mobile for a child’s room.
I hope you’ve enjoyed this journey into origami dinosaur creation. Remember, the most important ingredient is your willingness to try. Happy folding!
Conclusion
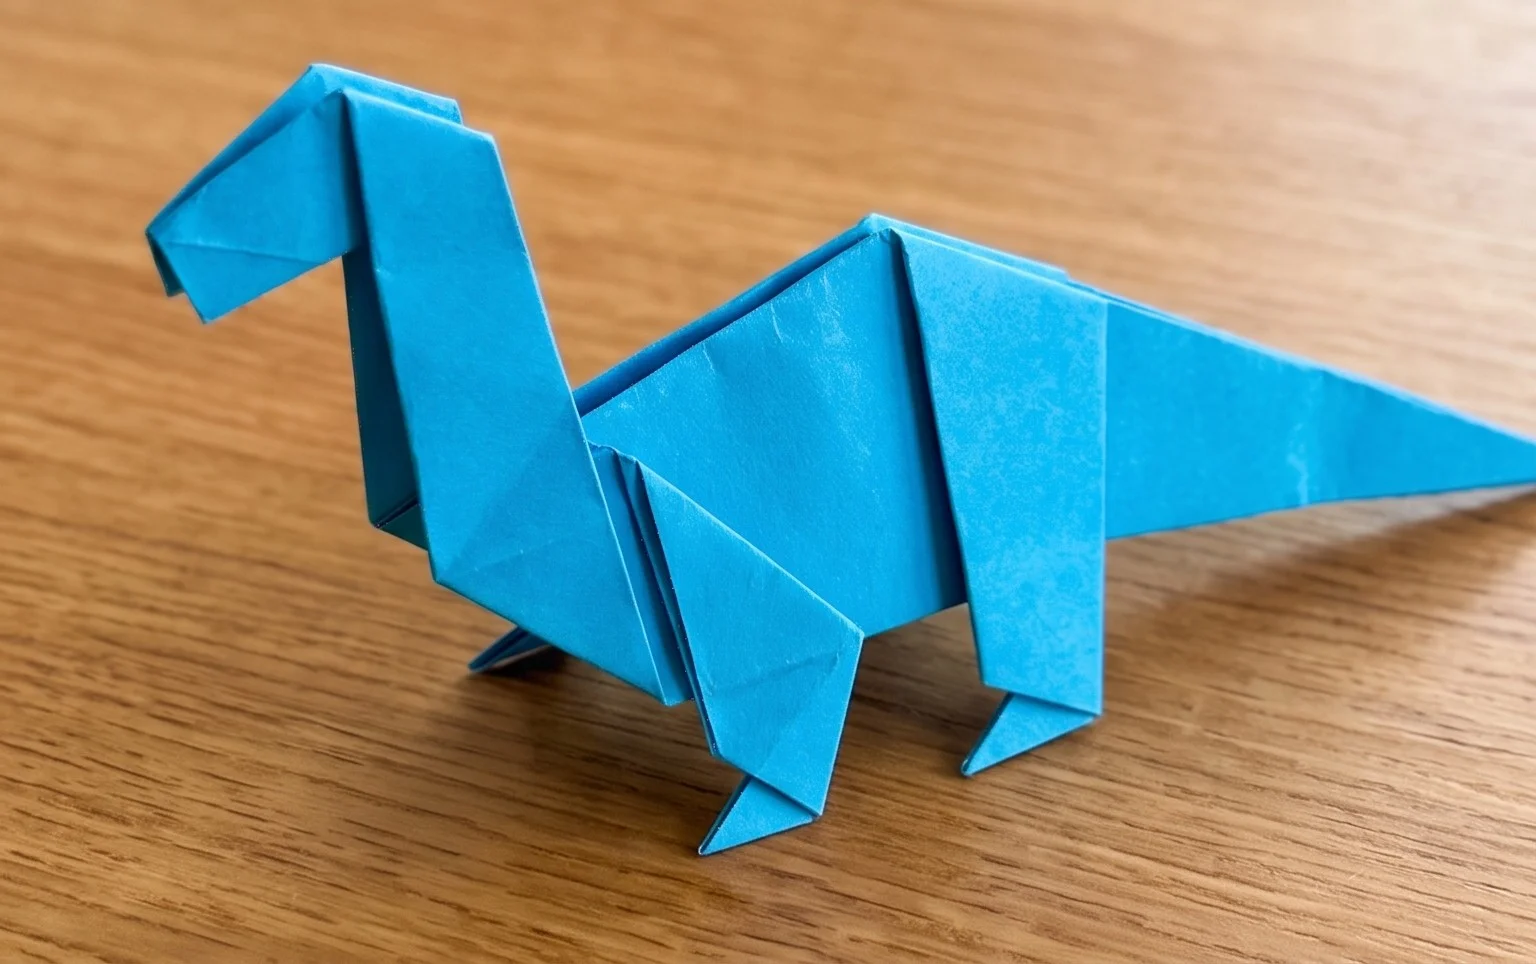
Congratulations on completing your very own origami dinosaur! Don’t worry if your first attempt isn’t perfect; that’s what practice is for. Every fold is a step towards mastery. We encourage you to share your amazing creation with friends and family – they’ll be roaring with admiration! For your next adventure, try creating a different species like a Stegosaurus or a long-necked Brachiosaurus. There are so many wonderful origami dinosaur designs waiting for you. Keep folding, and don’t hesitate to explore our other paper projects for even more creative fun!