Easy Origami Forest Animals Cootie Catchers for Kids
Forest Animals Cootie Catchers are about to bring a whole lot of woodland magic to your crafting table! Imagine a colourful paper fortune teller, but instead of silly fortunes, each flap reveals a cute, simplified origami forest creature – think a friendly fox peeking out, a shy owl ready to hoot, or a playful squirrel with a bushy tail. These are perfect for complete beginners and kids of all ages, taking about 10-15 minutes to fold from start to finish. They make fantastic party favours, classroom crafts, or just a fun afternoon activity. We’ll guide you step-by-step through folding the basic cootie catcher and then transforming it into a habitat for your adorable paper pals. Get ready to unleash your inner origami artist and create some truly charming forest friends!
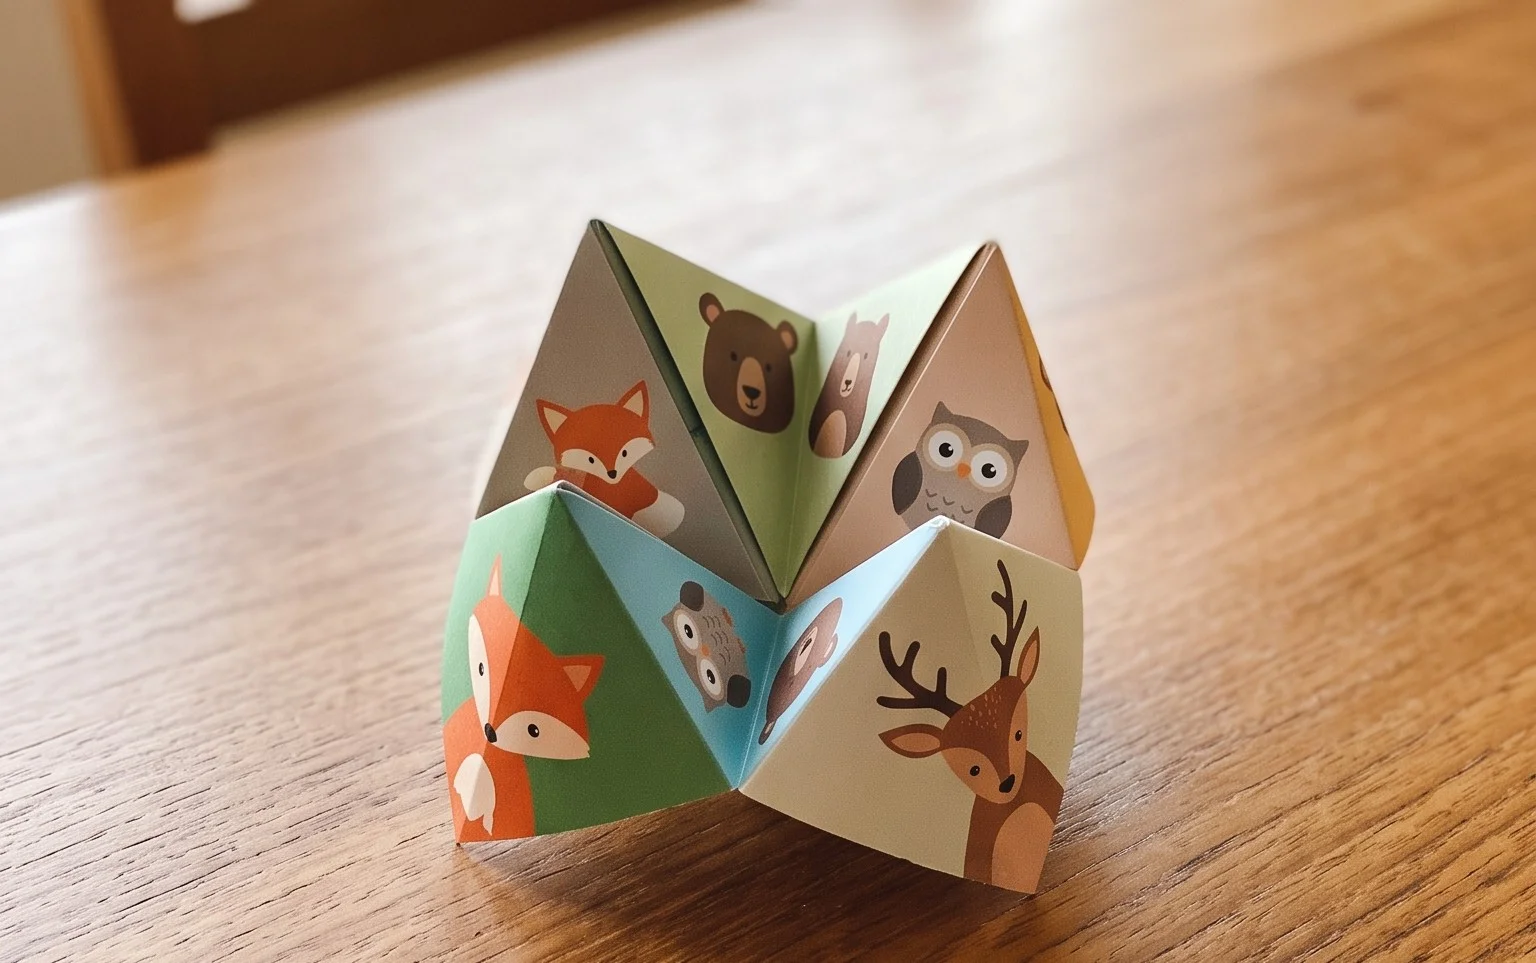
Forest Animals Cootie Catchers – Origami for Kids – Easy Peasy and Fun
Hello there, origami adventurers! Today, we’re going to have so much fun creating some fantastic forest animal cootie catchers. These aren’t just any cootie catchers; they’ll be adorned with adorable forest critters, making them perfect for play, decoration, or even a special handmade gift. Origami is a wonderful way to spark creativity and develop fine motor skills, and this project is wonderfully simple, perfect for little hands or anyone just starting out on their origami journey. We’ll go step-by-step, and I’ll guide you through every fold, so don’t worry if you’ve never made a cootie catcher before!
Choosing Your Paper: The Foundation of Fun
The right paper can make all the difference in origami. For these forest animal cootie catchers, I recommend using standard origami paper.
Origami paper comes in a few key types, but for this project, regular origami paper is ideal. It’s usually thin enough to fold multiple layers easily without becoming too bulky, yet strong enough to hold its shape. You can buy it in sheets of various sizes, but a good starting point is 6-inch by 6-inch (approximately 15cm by 15cm) squares. This size is perfect for children’s hands to manage and for the cootie catcher to be a good size for playing with.
In terms of weight, standard origami paper is typically around 70-80 gsm (grams per square meter). This is a good balance – not too flimsy, not too stiff. If you can only find thicker paper, like cardstock, it might be a little more challenging to fold, especially with the multiple layers involved in a cootie catcher.
Now, about whether to use single-sided or double-sided paper. For this project, I find **double-sided paper** is the most fun! This means both sides of the paper have a different colour or pattern. This way, when you make your folds, you’ll get lovely pops of colour and pattern showing through, making your forest animals even more vibrant. If you only have single-sided paper, that’s perfectly fine too! You’ll just end up with a cootie catcher that’s one colour on the outside and white on the inside. You can always decorate the white parts later with crayons or markers.
The Base Folds: Building Our Cootie Catcher
Before we get to the fun animal decorating, we need to master a couple of essential folds that form the base of all cootie catchers. Precision here makes everything else much easier!
The first crucial fold is creating a perfect square from a rectangular piece of paper. If you’re using pre-cut origami squares, you can skip this step. However, if you’re using standard printer paper or another rectangular sheet, here’s how to make a perfect square:
- Start with your rectangular paper lying flat in front of you, with the longer sides running horizontally.
- Take the top right corner and fold it diagonally downwards so that the top edge of the paper lines up perfectly with the left edge. You’ll see a triangle forming on the left side and a rectangular strip remaining at the bottom.
- Crease this fold very firmly. You can use your fingernail to run along the fold to make it nice and sharp.
- Now, take the excess rectangular strip at the bottom and fold it upwards, pressing it firmly against the triangle you just made. You want this crease to be as straight and sharp as possible.
- Unfold the last step. You should now have a horizontal crease across the bottom of your paper, separating the triangle from the rectangular strip.
- Carefully cut or tear along this horizontal crease. You can use scissors for a clean cut, or if you’re feeling brave and have good paper, you can fold the strip back and forth along the crease several times to weaken it, then carefully tear it away. What you’re left with is a perfect square.
Once you have your square, we move on to the main cootie catcher base folds.
- Place your square paper flat in front of you with the coloured side (if using double-sided paper) facing down. You should be looking at a plain white or single-coloured side.
- Take the bottom edge and fold it up to meet the top edge perfectly. Crease this fold firmly. You now have a rectangle.
- Take the right edge of this rectangle and fold it over to meet the left edge perfectly. Crease this fold firmly. You now have a smaller square.
- Unfold the last two folds. You should now have a square with two creases running through the middle, forming a cross shape, dividing the paper into four smaller squares.
- Now, turn the paper over so the coloured side is facing up.
- Take each of the four corners and fold it inwards so that the tip of each corner meets the exact center point where the creases intersect. Crease each of these folds firmly. When you’re done, your paper should look like a smaller square, with four triangular flaps pointing inwards towards the center.
The Fold Sequence: Step-by-Step to Your Cootie Catcher
Now that we have our base prepared, let’s complete the cootie catcher. This part is where it all comes together!
- With your paper still in the smaller square shape from the last step (coloured side up, four corners folded to the center), flip the entire thing over.
- You should now be looking at the plain side of your paper, with four square flaps from the previous folds showing.
- Just like before, take each of these four corners and fold them inwards so that the tip of each corner meets the exact center point. Crease these folds firmly. You’ll now have an even smaller square, with four new triangular flaps pointing inwards towards the center.
- Now, take your folded paper and fold it in half horizontally. Bring the bottom edge up to meet the top edge. Crease this fold very firmly.
- Keeping it folded in half, now fold it in half vertically. Bring the right edge over to meet the left edge. Crease this fold very firmly. You should now have a small, folded square with two flaps on each side.
- Here’s the magic part! You should see four little pockets or openings at the corners of your folded square. Gently slide your thumbs and index fingers into these four pockets.
- With your fingers inside, gently push the sides of the cootie catcher inwards, while simultaneously pulling the corners outwards. This is where the cootie catcher opens up! You might need to gently wiggle it a bit to get it to pop into its recognisable shape.
Congratulations! You’ve made the basic structure of your cootie catcher.
Common Pitfalls and How to Avoid Them
Don’t worry if your first attempt isn’t absolutely perfect. Origami takes a little practice, and there are a couple of common spots where beginners can get a bit stuck.
- Messy Creases: This is the number one culprit! If your folds aren’t crisp and clean, the cootie catcher won’t open and close smoothly. Always use your fingernail or a bone folder to really flatten and sharpen every single crease. Think of it as giving your paper a good, firm hug along the fold line.
- Not Meeting Corners Exactly: When folding the corners into the center, it’s crucial that they meet precisely at the center point. If they overlap or leave gaps, the final shape will be a bit wonky, and the pockets won’t form correctly. Take your time and align the tips of the corners with the intersection of the creases.
- Forgetting to Flip the Paper: In step 5 of the base folds, we flip the paper over to fold the corners to the center again. If you forget to flip it, you’ll end up with a different, less functional shape. Always remember to flip it when instructed.
Varying Your Cootie Catcher: A World of Possibilities
The beauty of origami is its versatility! Here are some ways to make your cootie catchers even more unique:
- Size Matters: As I mentioned, 6-inch squares are great for starters. But if you want a giant cootie catcher for a puppet show, try using larger paper, like 12-inch squares. For tiny, pocket-sized ones, use 3-inch squares. Just remember that the folding proportions will be the same, but the scale changes.
- Paper Patterns and Colours: This is where the forest animal theme really shines! Use paper with woodland prints, leaves, trees, or even plain coloured paper in earthy tones like greens, browns, and greys. You can also combine different patterned papers for the outside and inside for a really dynamic look.
- Decorate Before or After: Before you start folding, you can draw or stick on your forest animals onto the paper. Once the cootie catcher is made, you can draw or write inside the flaps. This is where you can add your owl, fox, deer, or bear illustrations!
Ideas for Displaying or Gifting Your Finished Masterpieces
Once your forest animal cootie catchers are complete, they’re ready for action!
- Playtime Fun: The classic cootie catcher game is a blast. Write fortunes, dares, or names of forest animals inside.
- Classroom Decor: String them together with yarn to create a whimsical garland for a classroom or bedroom.
- Party Favors: These make fantastic, handmade party favors for birthdays or woodland-themed events.
- Storytelling Props: Use them as props to tell stories about your favourite forest animals. Each flap can represent a different character or part of the story.
- Gifting with Love: Package a few together in a small box or cello bag with a handwritten note. They are a thoughtful and personal gift that shows you put in extra effort and care.
I hope you’ve enjoyed creating these forest animal cootie catchers! They’re a simple project with so many opportunities for creativity and fun. Keep practicing, and soon you’ll be folding them with ease, ready to bring a touch of the forest into your world. Happy folding!
Conclusion
Congratulations on folding your very own forest animals cootie catcher! We hope you had a blast creating these adorable origami friends. Don’t worry if your first one isn’t perfect; every origami journey starts with practice. We encourage you to try folding another forest animals cootie catcher and see how your skills improve! Once you’re happy with your creations, share them with friends and family – they’ll love playing with them!
Ready for More Fun?
For your next origami adventure, try folding a simple origami frog or a classic paper airplane. The world of paper projects is vast and exciting! Keep folding, keep creating, and most importantly, keep having fun!